How to manage your odio nodes from one app
The odio application is a web app that lets you manage all your odio nodes from one place. Install it from your browser on your phone or desktop.
How it works
Section titled “How it works”The application loads each node’s embedded web UI in an iframe. You get the full interface of each node, playback, audio routing, Bluetooth, services, power, all accessible from a single app.
Installation
Section titled “Installation”- Open pwa.odio.love in your browser.
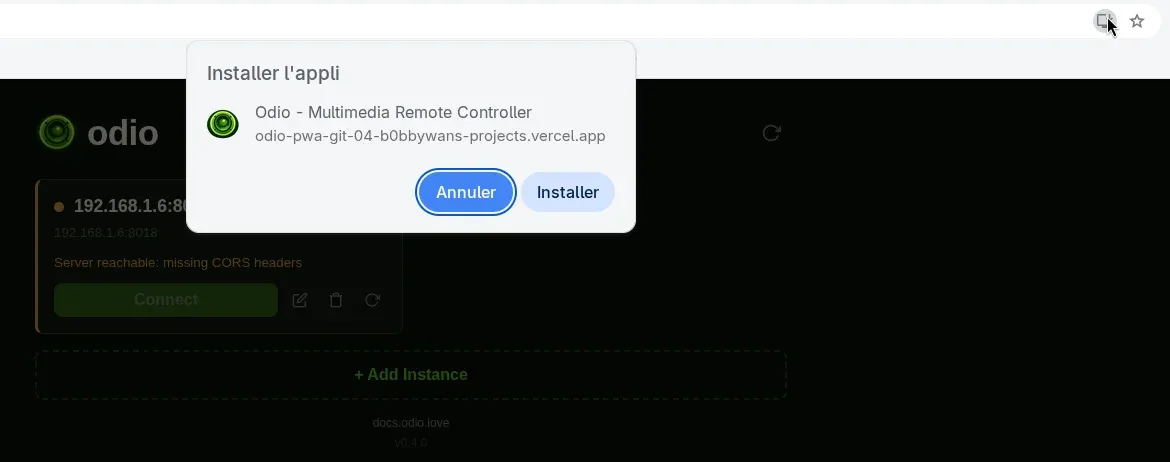
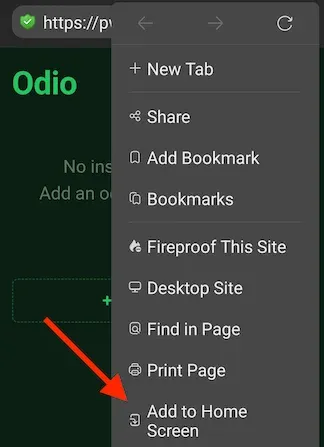
- Tap “Install” or “Add to Home Screen” when prompted.
- Add your nodes by hostname or IP.
Browser support. On mobile, installation works on Chrome, Edge, Safari, and Firefox. On some browsers like DuckDuckGo, the option is in the three-dot menu. On desktop, Chrome and Edge can install the app; Firefox and Safari desktop hit browser-level restrictions on LAN access.
Adding nodes
Section titled “Adding nodes”A web app cannot perform mDNS/Zeroconf discovery — browsers don’t have access to UDP multicast. That’s why you need to add your nodes manually by hostname or IP.
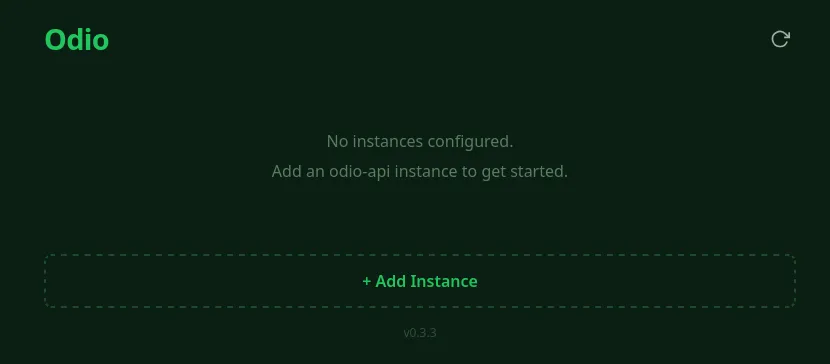
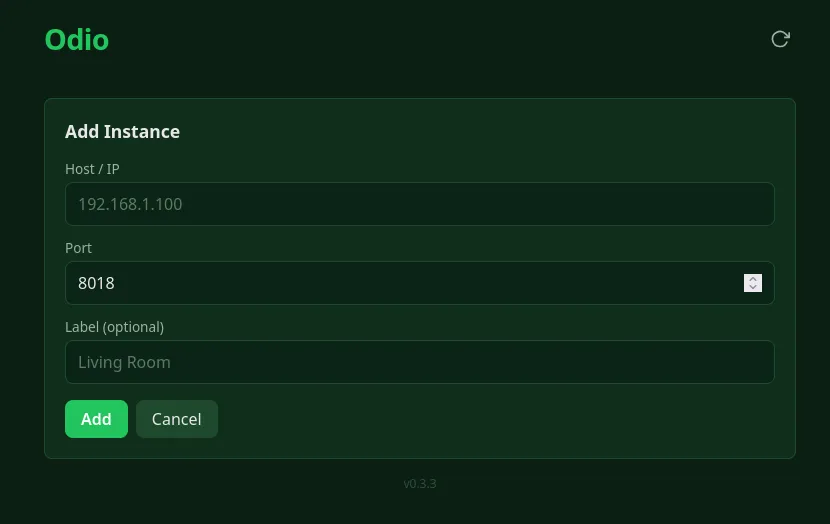
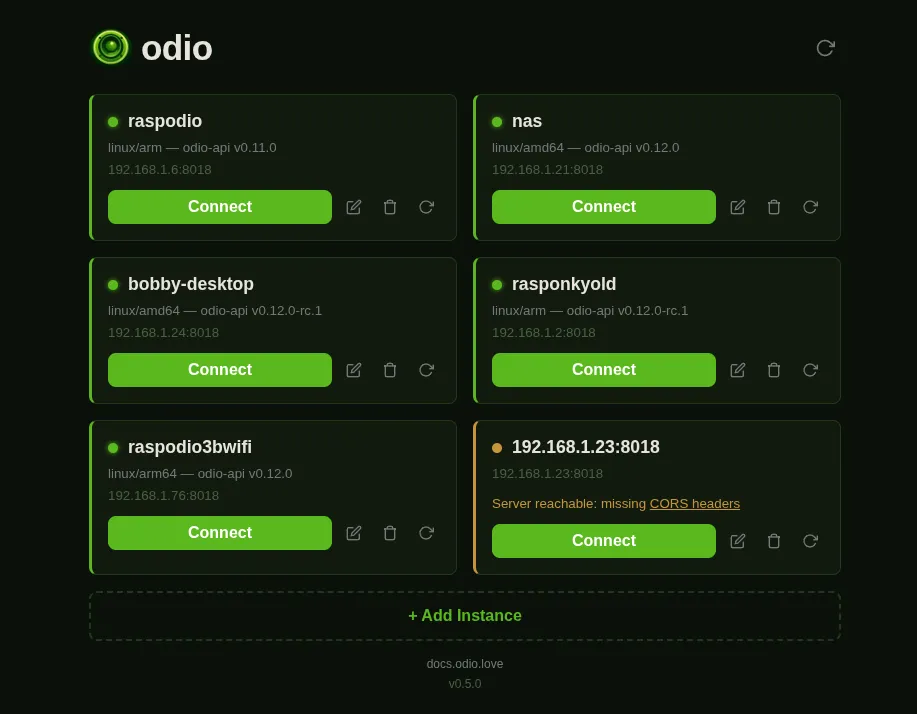
On first launch, click + Add Instance and enter the host/IP, port (default 8018), and an optional label for your node. Add as many as you have, each card shows the node name, architecture, odio-api version, and connection status. Click Connect to open the node’s interface.
A CIDR-based subnet scanner is tracked in odio-pwa#12 as a workaround for the missing mDNS. Contributions welcome, a nice entry point for frontend devs who want to try Svelte.
Open a node by URL
Section titled “Open a node by URL”Since v0.5.0, the active instance lives in the URL, so any node can be opened directly:
https://pwa.odio.love/#/i/<host>[/<port>][?label=<name>]Port and label are optional. First-time visits stay transient and the app prompts to save on exit. Hash routing also means refresh and the back/forward buttons behave like any other web app.
odio also print the matching link in the SSH MOTD, so SSH’ing to a node gives you a one-click path to its UI in the PWA.
In-app diagnostics
Section titled “In-app diagnostics”The application surfaces the situations described below directly in the UI so you don’t have to dig through devtools to know what’s wrong.
Unsupported browser banner
Section titled “Unsupported browser banner”When the PWA detects Firefox or Safari desktop on an HTTPS context (the combinations that cannot reach LAN nodes at all), it shows a persistent banner pointing back at this guide and disables the + Add Instance button. There is nothing useful those browsers can do without switching browser or self-hosting over HTTP.

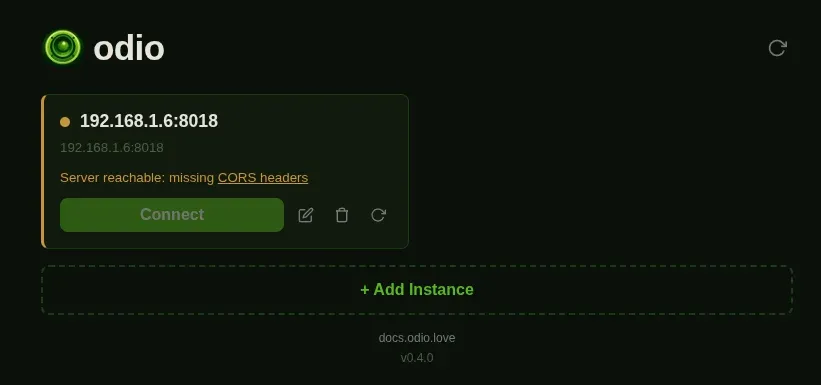
Per-card status messages
Section titled “Per-card status messages”When a probe fails for an existing node, the card re-probes with mode: 'no-cors' to tell three failure modes apart:
| Card message | Color | What it means |
|---|---|---|
| Server unreachable | red | The server is down, or the request was blocked at the network layer. |
| Server reachable: missing CORS headers | amber | The request round-tripped but the response lacks Access-Control-Allow-Origin. Add the PWA’s origin to api.cors.origins. |
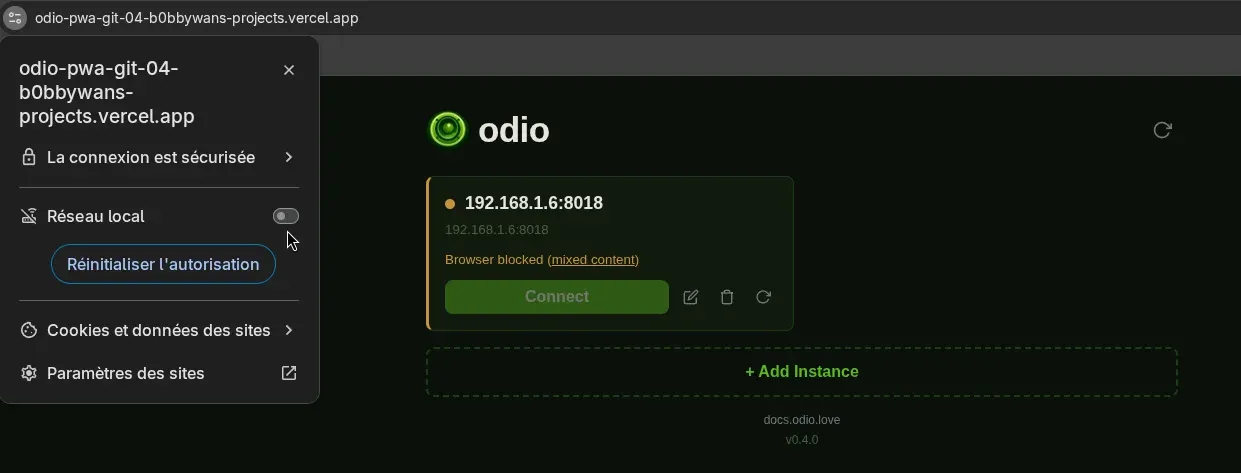
| Browser blocked (mixed content) | amber | Both probes failed on an HTTPS PWA, so a browser-level mixed-content block is the most likely cause. Use Chrome 142+ with LNA granted, or self-host over HTTP. |
The amber messages embed a link to the relevant docs section so you can jump straight from the card.
Connection-status screens
Section titled “Connection-status screens”Since v0.5.0, clicking Connect on a node that doesn’t respond shows a dedicated Connecting, Server unreachable, or Browser blocked view instead of the native broken-iframe error. Deep links to a host you’ve never reached land on the same screen rather than the Server is shutting down overlay.
Browser limits and alternatives
Section titled “Browser limits and alternatives”LAN access
Section titled “LAN access”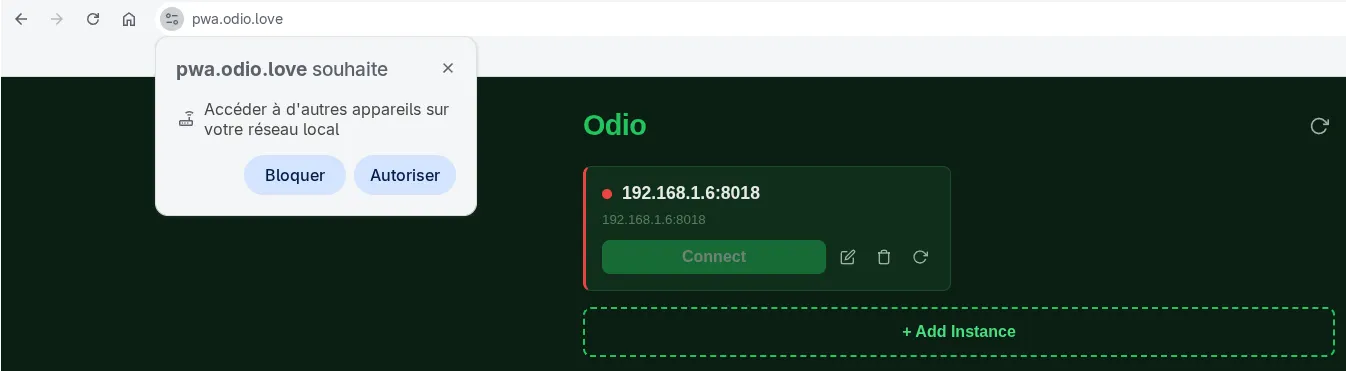
pwa.odio.love is the easiest path, but it’s not the only one. If your browser blocks mixed content, doesn’t support PWA install, or you only have one node, these alternatives may fit better.
Single node: bookmark the embedded UI
Section titled “Single node: bookmark the embedded UI”If you only have one odio node, the PWA isn’t really needed. Bookmark the node’s embedded web UI directly, it’s the simplest option, especially on a browser that doesn’t allow PWA install.
Multiple nodes, no install: self-host over HTTP
Section titled “Multiple nodes, no install: self-host over HTTP”If you have several nodes and don’t need the installable-app experience, self-host the PWA on your LAN over plain HTTP. No mixed-content restriction, no CORS setup, just bookmark the address and access it from any device on your network. See Self-hosting below.
Multiple nodes with install: self-host over HTTPS
Section titled “Multiple nodes with install: self-host over HTTPS”To keep PWA install, self-host the PWA over HTTPS on a local address, for example with Traefik and Let’s Encrypt. The mixed-content situation is unchanged since the HTTPS PWA still calls HTTP nodes, so this setup still requires a Chromium-based browser (Chrome 142+ with LNA granted, or Edge). Add your self-hosted origin to api.cors.origins in each node’s config so the API accepts requests from your PWA, see CORS on each node below.
Self-hosting
Section titled “Self-hosting”Self-hosting has always been possible by cloning and building the repo yourself. v0.3.4 makes it easier with an official Docker image and a ready-to-deploy static zip.
-
Docker (multi-arch, amd64 + arm64):
Terminal window docker run -d -p 8080:80 --restart unless-stopped \--name odio-pwa ghcr.io/b0bbywan/odio-pwa:latestThe image is based on
nginx:alpinewith SPA fallback and PWA-aware cache headers already configured. -
Static zip — download
odio-pwa-<version>.zipfrom the releases page and serve the extracted files from any web server. Make sure unrecognized paths fall back to/index.html, and setCache-Control: no-cacheon/index.html,/sw.js, and/registerSW.js.
CORS on each node
Section titled “CORS on each node”If you serve the PWA over HTTPS, the API on each node must accept your origin. Add it to api.cors.origins in every node’s config. The list replaces the defaults, so include the hosted addresses too if you want to keep them reachable:
api: cors: origins: - https://pwa.odio.love - https://odio-pwa.vercel.app - https://odio.yourdomain.com # your self-hosted originHTTP self-hosting on the LAN doesn’t require this, see Browser limits and alternatives above.
Updates
Section titled “Updates”An arrow indicator appears next to the app version when a newer GitHub release is available, click it to open the release notes. To include prereleases (for testing RCs), run in the browser devtools console:
localStorage.setItem('odio-include-prereleases', 'true')